Getting Started.
To install Icons 25 you will need a Power Platform environment
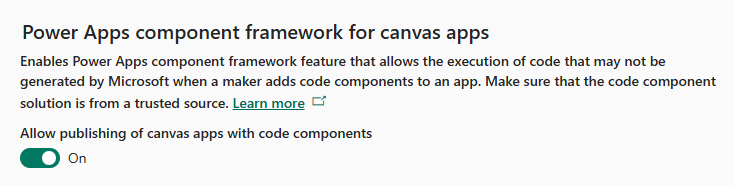
Step 1 – Enable Power Apps component framework for canvas apps.
In the Power Platform admin center select your environment and go to Settings –> Features and turn on the feature. Click Save!
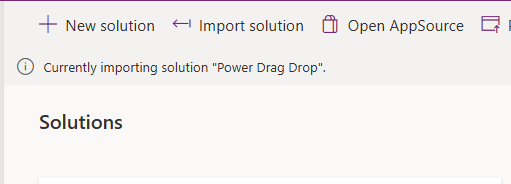
Step 2 – Import the Power Drag Drop PCF component
My favourite ever PCF control from Scott Durow, is used to drag and sort the menu packs, you can download here. It is required to be installed before installing the Icons 25 package.
Step 3 – Install Icons 25
Download the solution from P3N-101/Icons-25 and import.
Create the connections
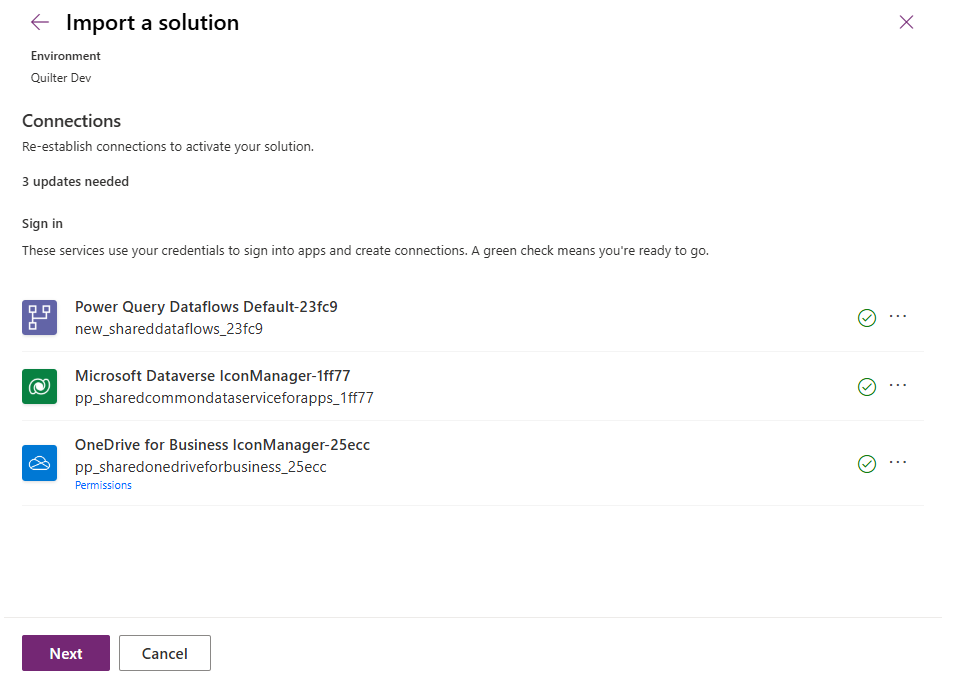
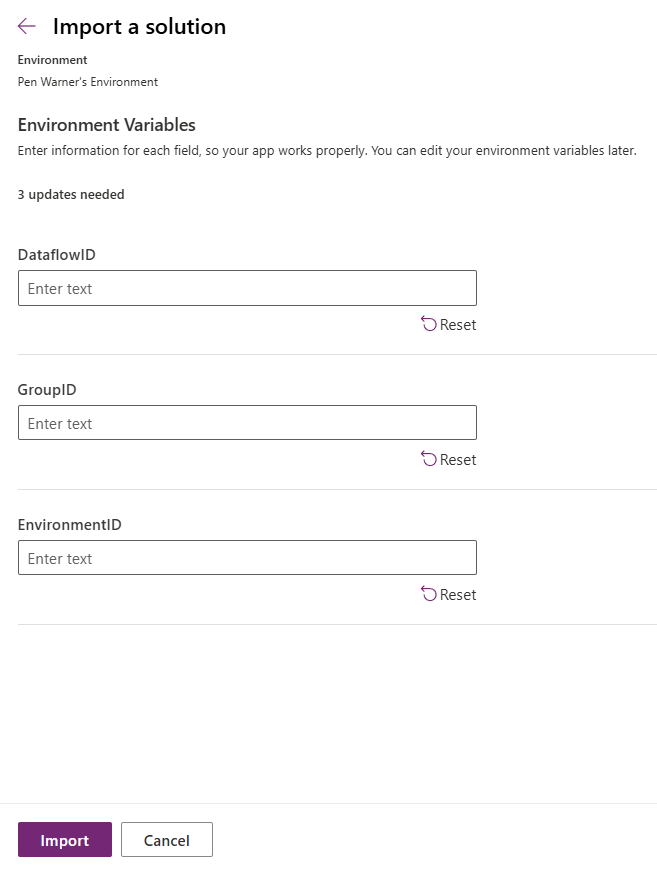
We need 3 environment variables for the flows and dataflow to work, however we will import the solution first and I will show you how to get the GroupID and dataflow id for your environment, you can get your environment id from the Power Platform Admin Center.
Click Import.
Once the solution has imported go to Flows and create a new instant flow, call it test!

Click create.
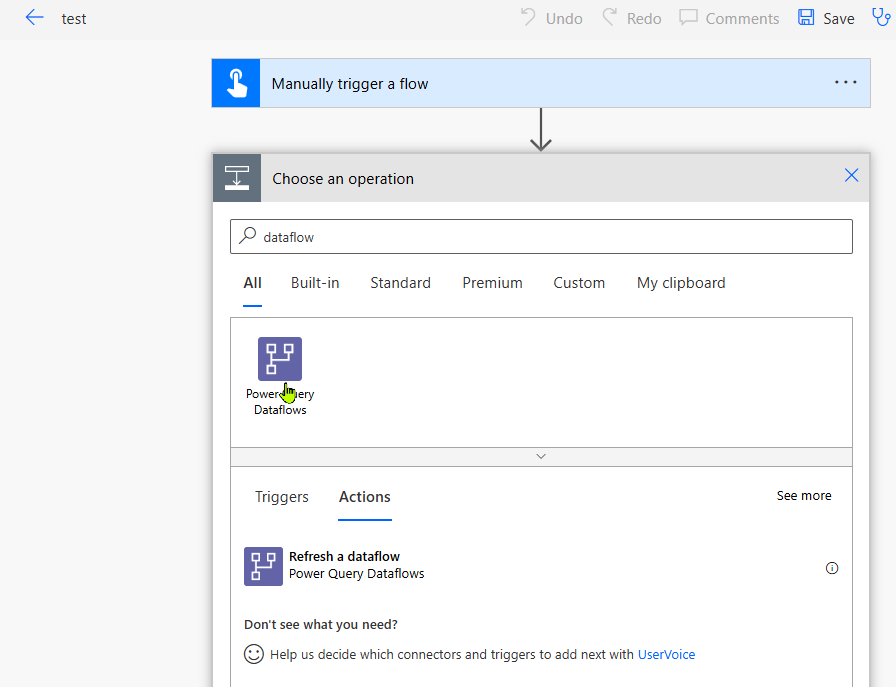
add the Refresh a dataflow action. Select PeekCode from the action menu.
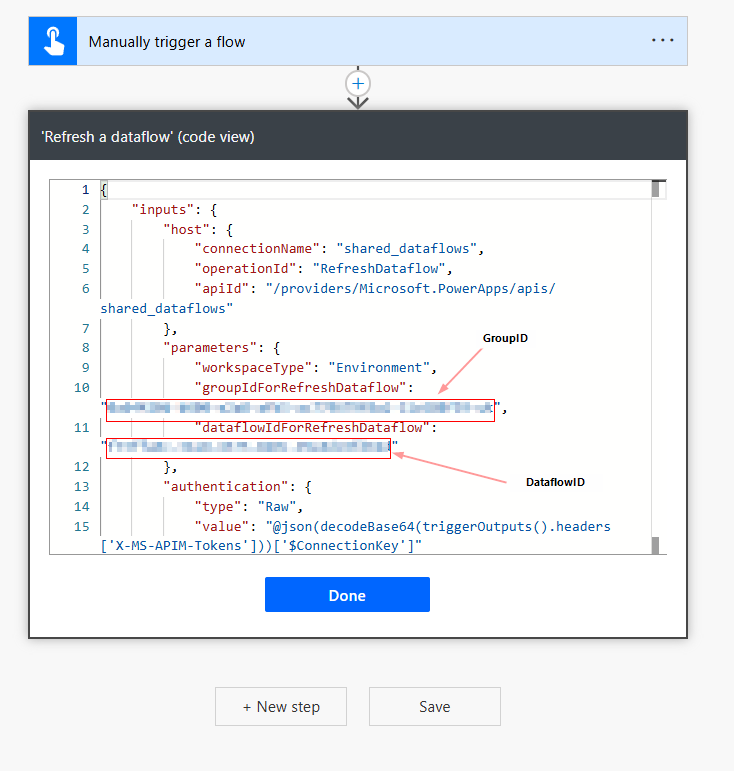
Copy the GroupID and DataflowID.
Close the flow and go back to make.powerapps.com, and go to solutions and open the Default Solution
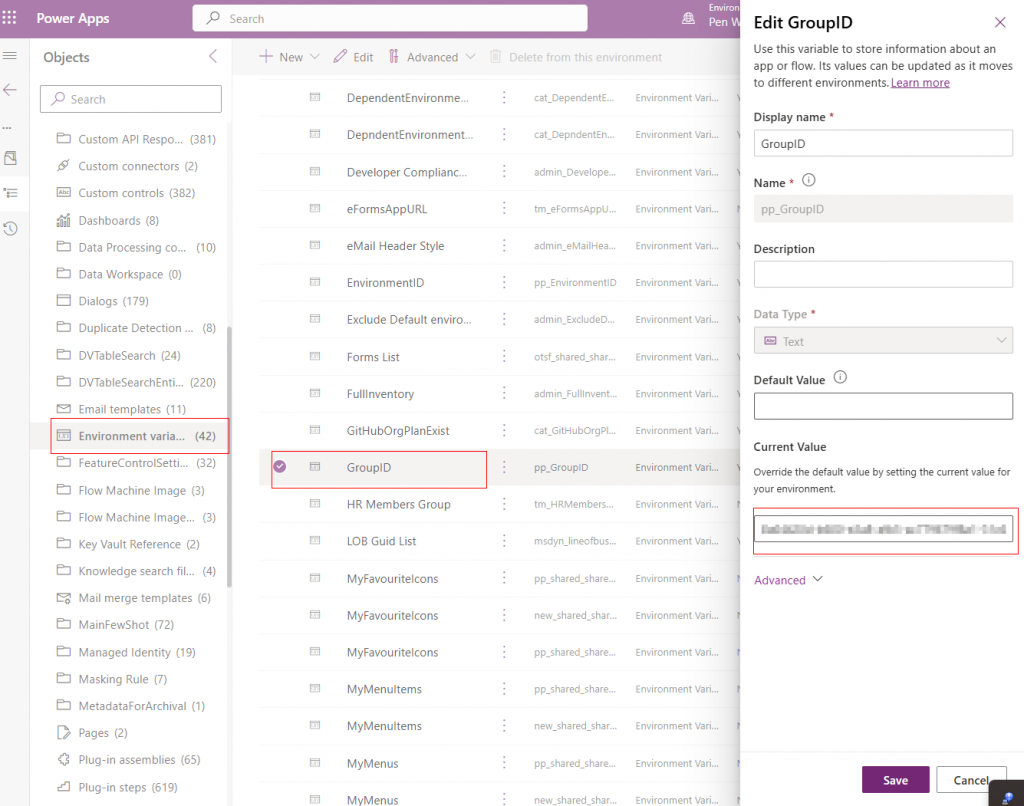
Open Environment Variables select GroupID and update the current value with the GroupID copied above, and do the same for EnvironmentID and DataflowID varibles.
Step 4 – First run
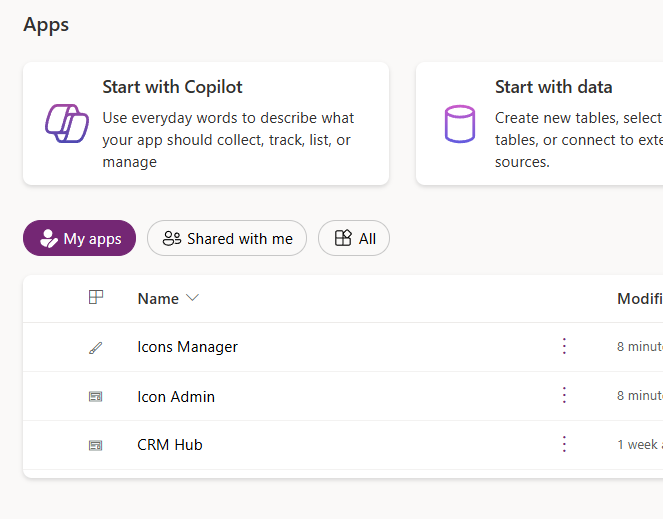
Once installed under apps you will see the Canvas App ‘Icons Manager’ Press Play to get started.
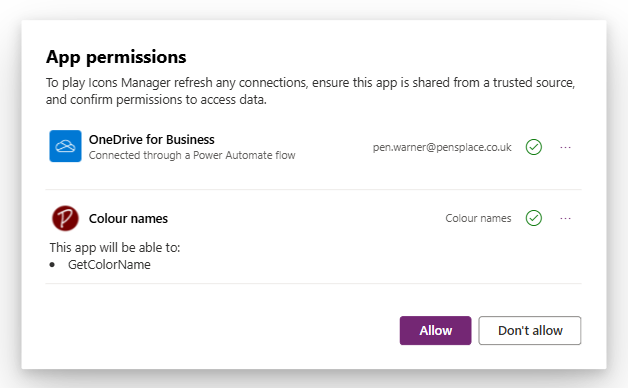
Create the connections and click Allow, once loaded it will take you to the first run screen to get you set up.
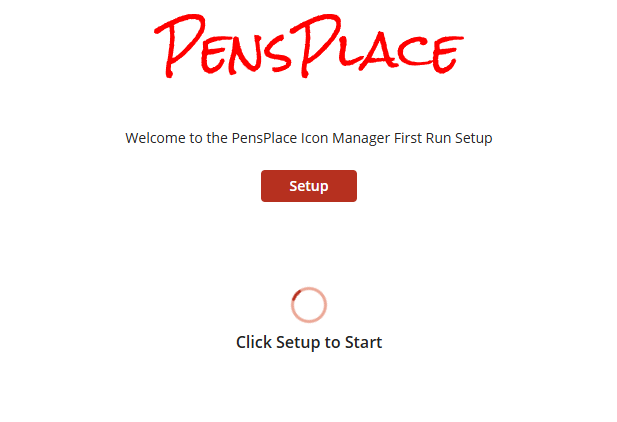
Click on Setup.
What this will do:
- Create the User Settings file
- Create the My Favourites Icon Pack (used to store user favourites.
- Runs the flow that Creates a folder on your onedrive called Icons with a dummy text file. This location is required for the dataflow.
Step 5 – Upload an Icon Pack and publish the Dataflow.
To get the Dataflow to operate we have to publish it, but first we need to upload and icon pack to create the file the dataflow relies on. Whilst a bit manual, I havent found a way to publish it without the file as it will fail.
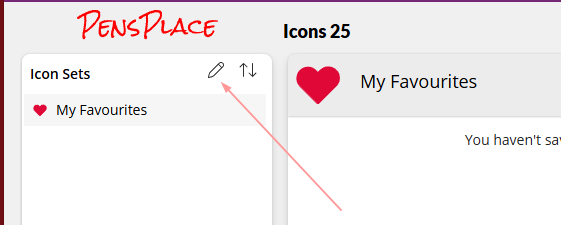
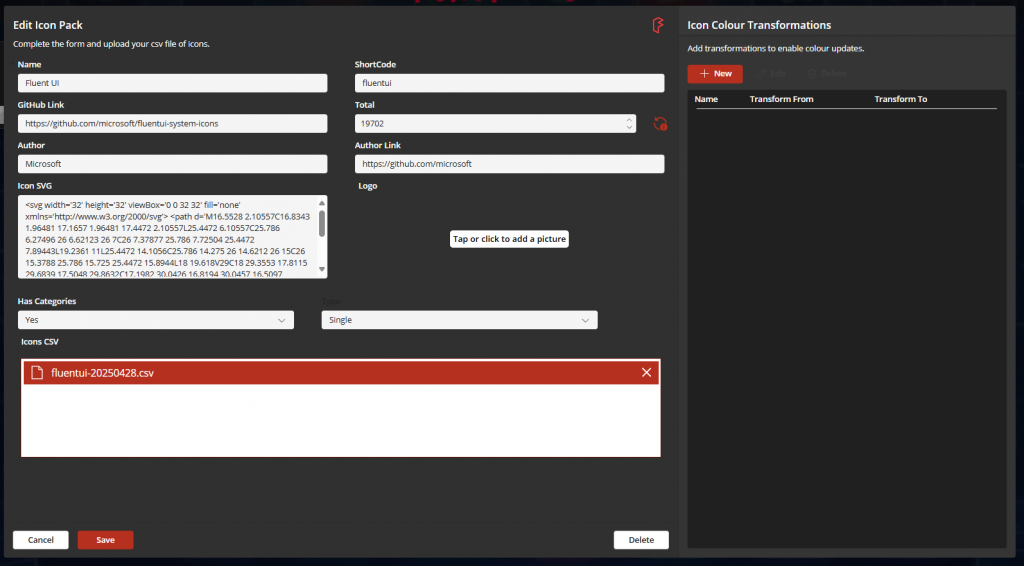
Click on the Edit icon to open the Pack Management Screen.
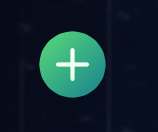
Click on the + Icon to create a new pack.
Download the Fluent UI System Icons pack from here.
And complete the form with the details on that page so that it looks like the following and click Save.

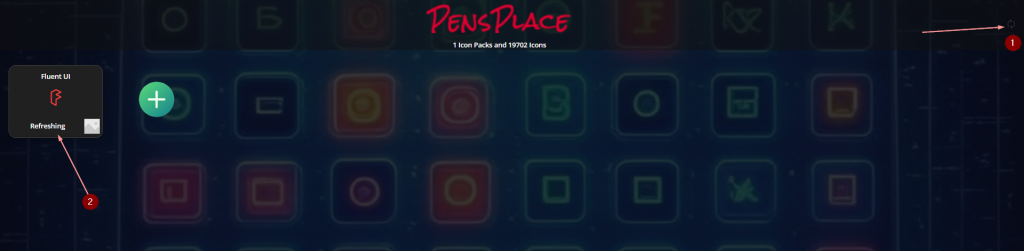
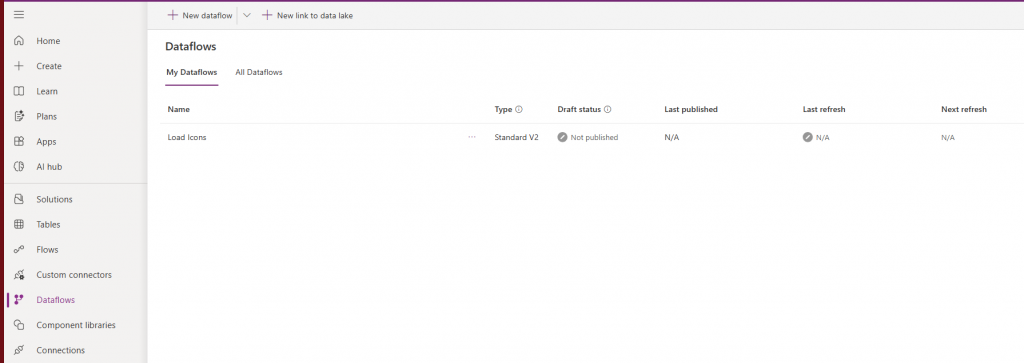
You can use the refresh icon (1) to update the status of the pack, once the Icon pack shows as refreshing (2), in your environment open Dataflows and you will see the following:
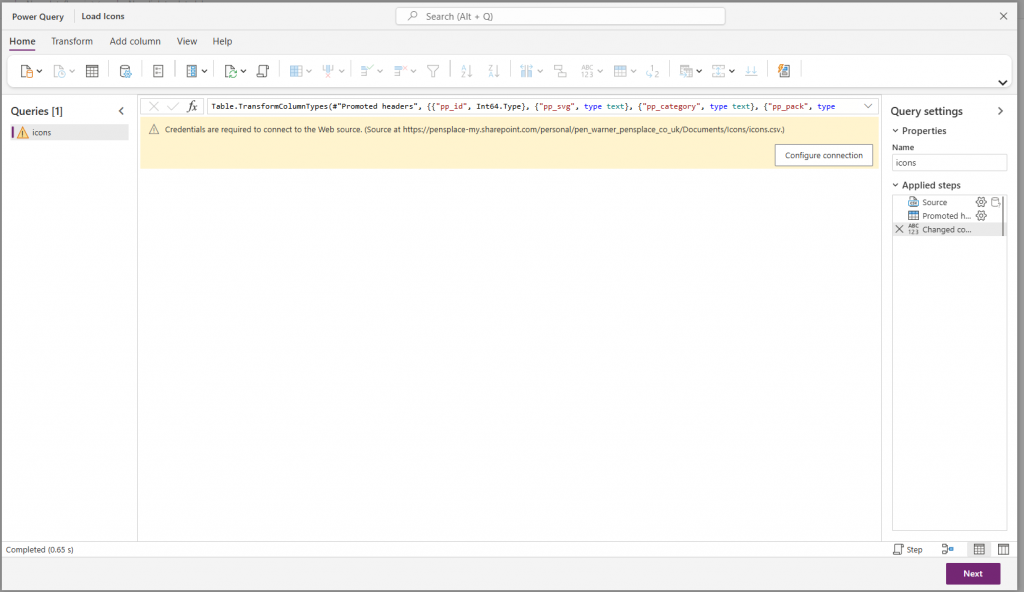
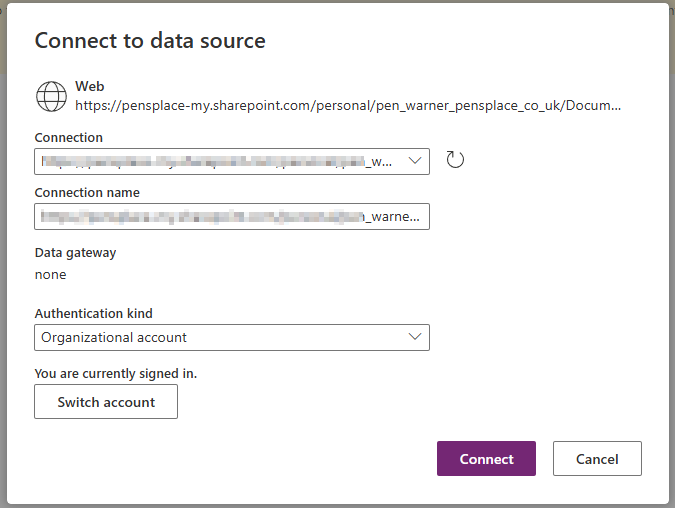
Edit the Dataflow and you will see the following click on Configure Connection
On the Connect to data source screen change the Authentication kind from Anonymous to Organizational Account and click Sign in.
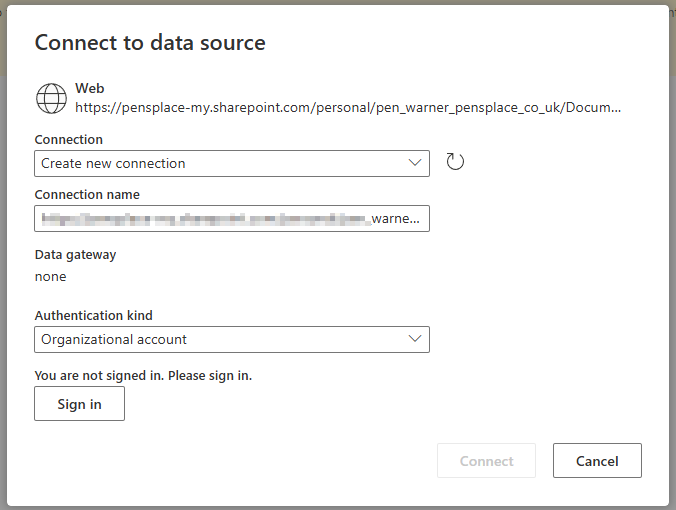
Once signed in click Connect
Click Next once it loads the file and click Publish
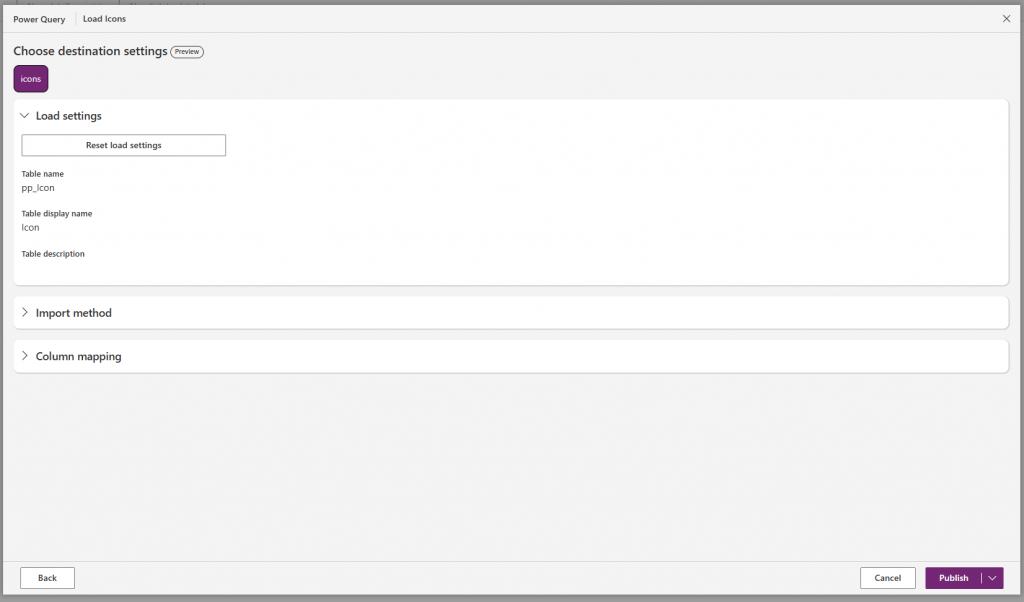
This will publish the Dataflow and refresh it loadint the first set of Icons.
Once the refresh is complete, refresh the app.
Congratulations Icons 25 is now installed.
Step 6 – Update the Transform for the Pack
Only one transform is reguired for the Fluent Ui pack and it substitutes #212121 with the Icon color token {{IconColor}}
Go to the Icon Pack Management screen and click on the Fluent UI pack to edit and Click on New under the Icon Colour Transformations Panel.
Add the following and click save.
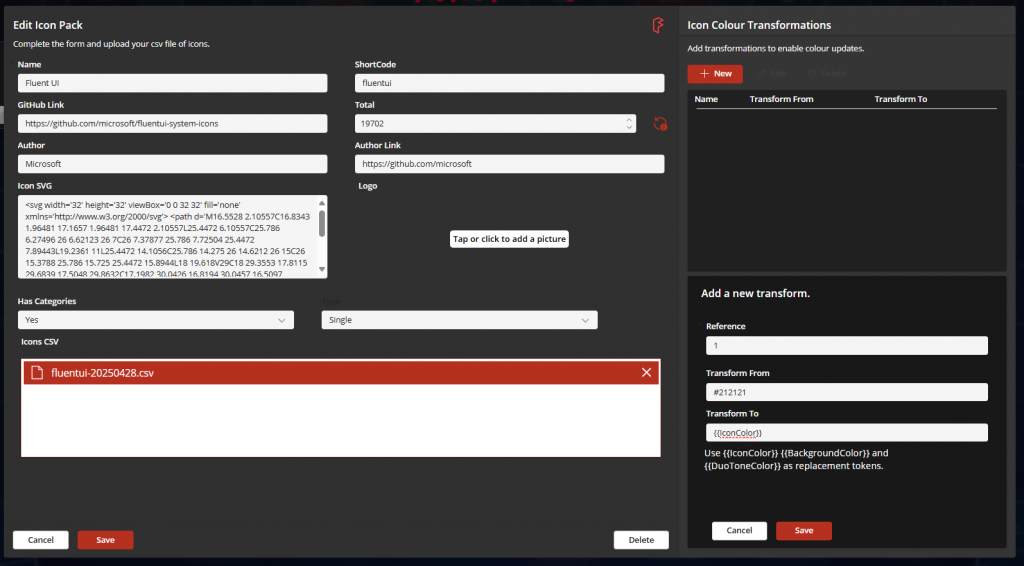
Once Saved click Cancel and Close the Pack Management Screen, now the icons will be coloured to your selected colour. Have fun!
7. Alternatively Load the data through Configuration Management Tool
In VSCode use pac tool cmt to open the Configuration tool,
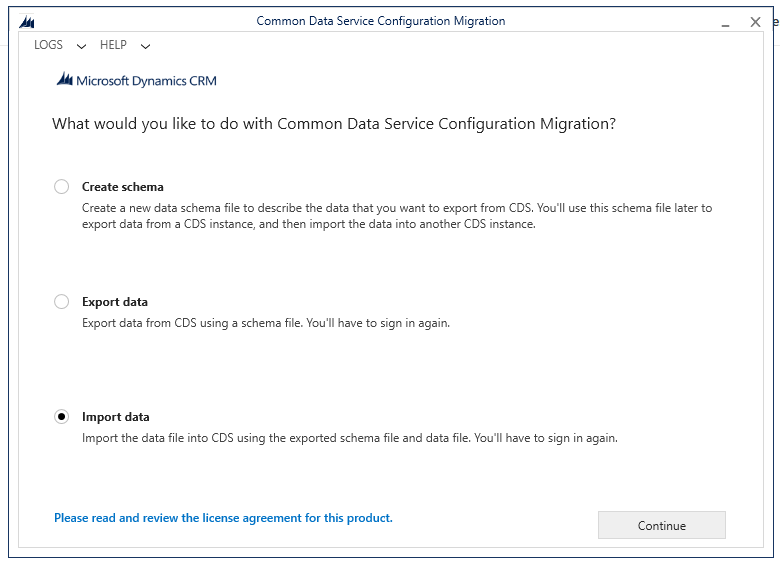
Click Continue, sign in and select your environment.
Select the data31.zip file from the repository.
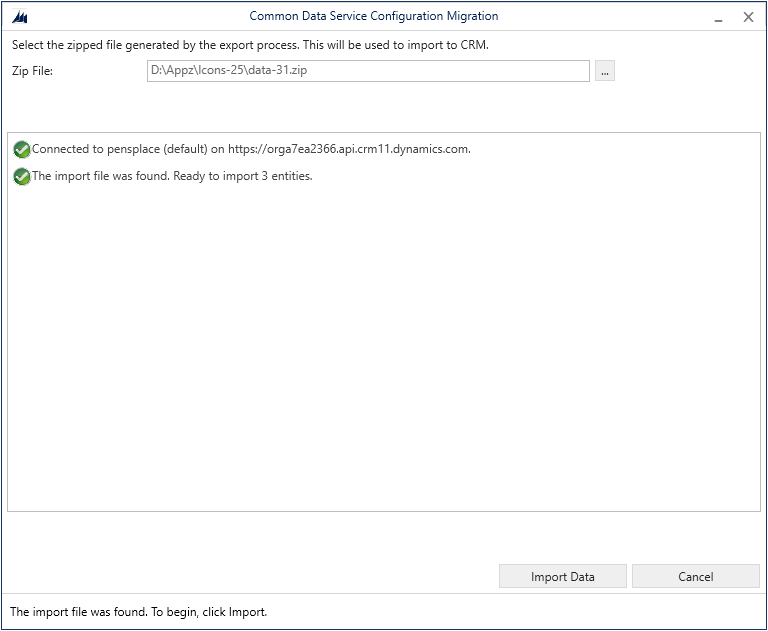
Click Import Data
 PensPlace